My DR650 is a 1999 model so it's about 14 or 15 years old at this point. And, although I bought it used, I'm pretty sure the rear suspension bearings have never been serviced. It was time. Unfortunately upon disassembly I found some badly rusted but not quite seized bearings on some of the linkage pivots.
This is a nasty, NASTY job and there are lots of expensive little needle bearings and seals. I don't want to have to do it again. My old DR350 had grease (zerk) fittings on the rear suspension pivots making the maintenance of the rear suspension a simple matter of a few squirts from a grease gun from time to time. It's a shame Suzuki didn't spend a couple of extra dollars including them on the 650 but, since I had it apart, I decided to fix that. I added zerk fittings to three of the five pivot points. The other two don't lend themselves to this approach as described below.
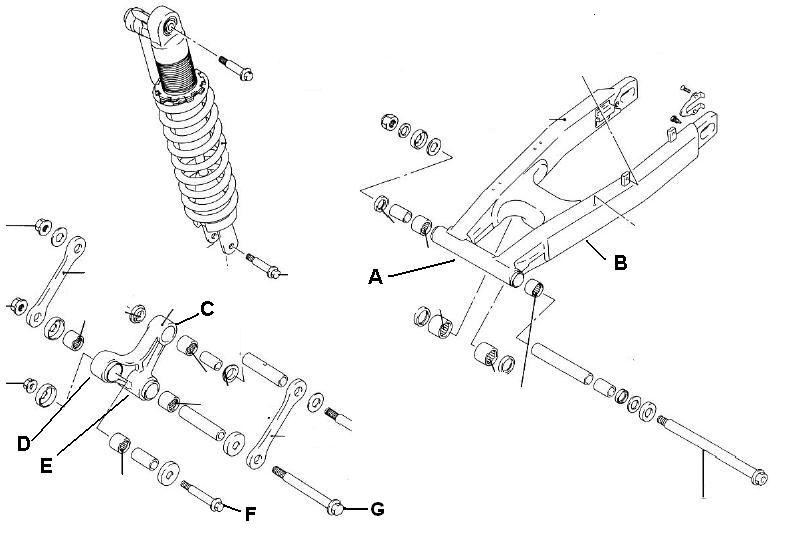
In the exploded view above pivot
points A, B and E use two separate bearings on the shaft ends
with an empty space (or a spacer) in between. Pivot points C and
D (based of the shock and attachment point to frame use a single
continuous bearing so a grease fitting would not be able to
insert grease into the "needles". (see post script below!)
By far the worst bearings were B and E on my bike so I figured installing fittings there along with the swingarm pivot would minimize future maintenance.
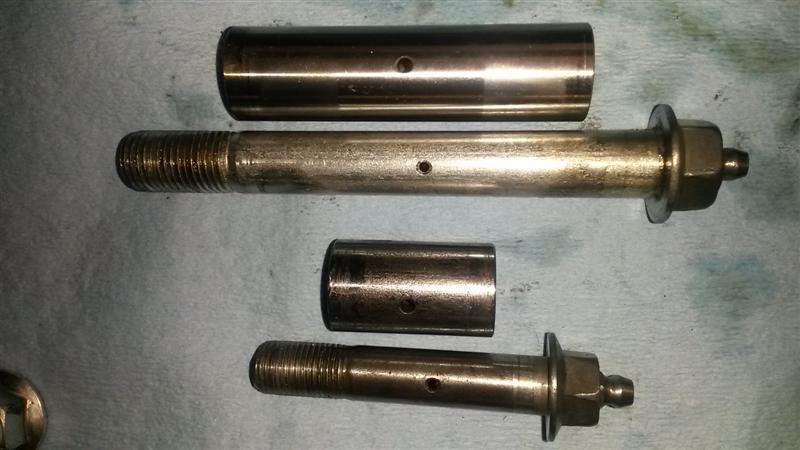
In order to remove/install new bearings a press is needed. They are really snug and I found that by heating the aluminum a bit with a propane tourch the steel bearings pressed out and in more easily.
Here are some pics of the installation in progress:
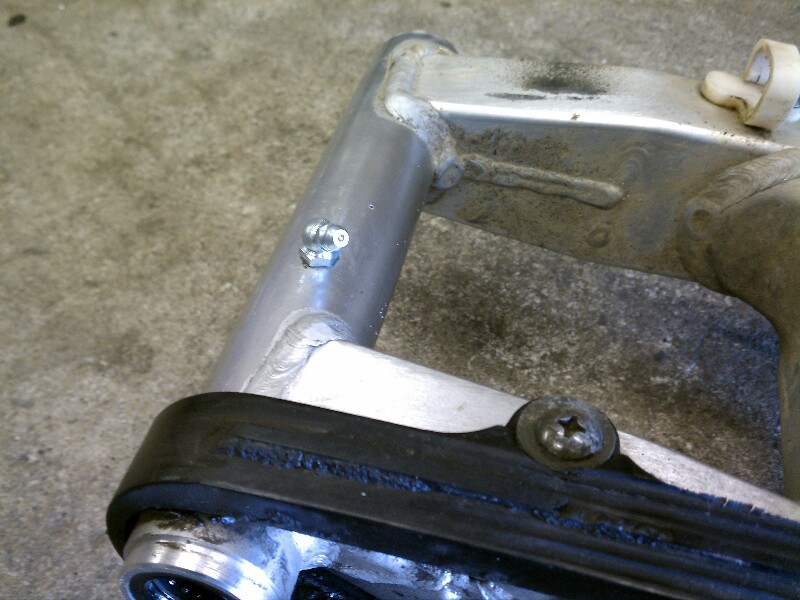
Pivot Point A - the swingarm pivot
Pivot Point B - mounting point for the links on the
swingarm
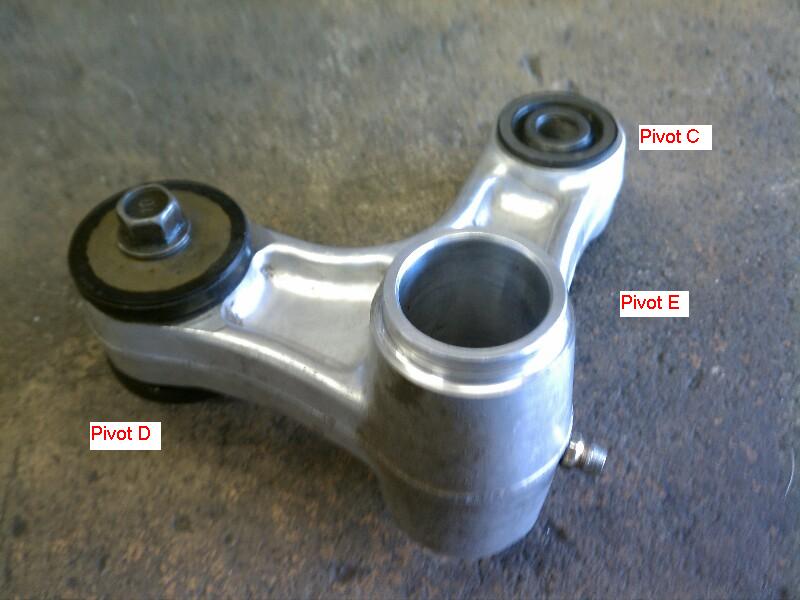
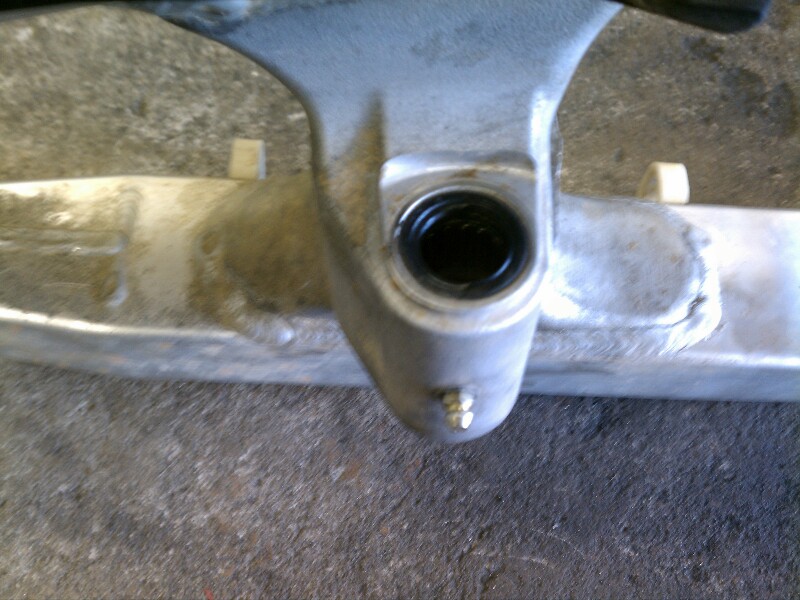
Pivot Point E - Linkage mounting point for the links
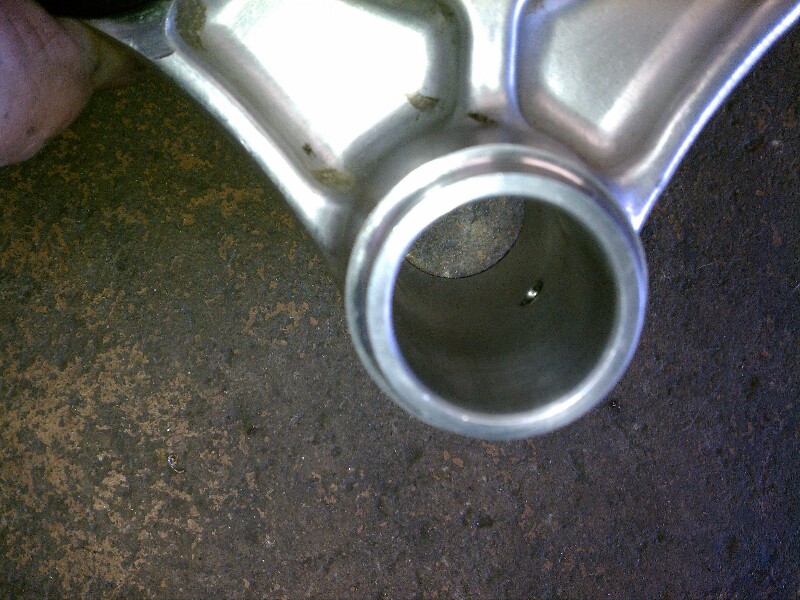
Inside View of Pivot Point E
All done. Greasing the linkage is just a matter of a few
shots of the grease gun.
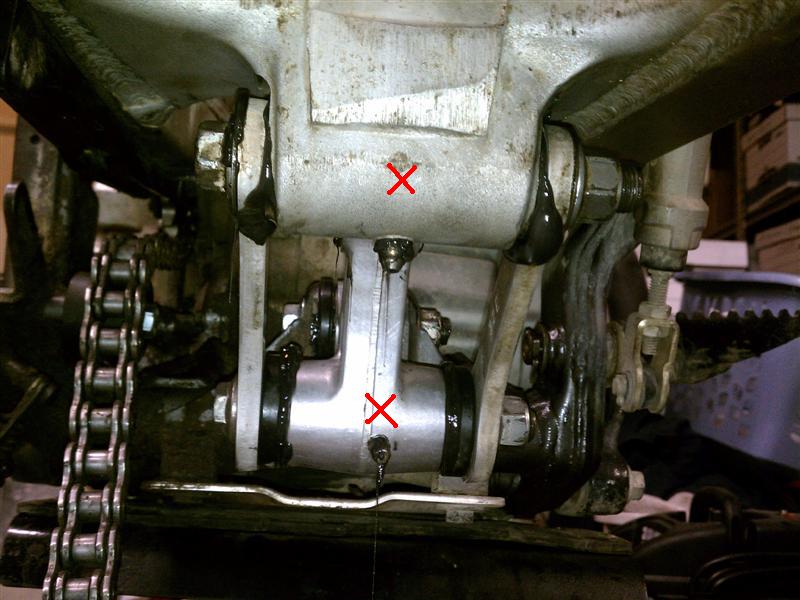
Obviously it's important
to look at the suspension components while still in place to
determine the best location for the fittings so that they are
accessable but do not interfere with suspension
movement and are not overly exposed to damage. In
retrospect, I should have located the zerk fitting on the pivots
B and E a bit further to the rear as they are more exposed
to potential damage than I like. If I ever take all this apart
again, I'll move them to approximately the locations of the
red X's but for now, it's all good. All-in-all this was a
relatively easy job AFTER getting everything apart. Like I said
a nasty, NASTY job and hopefully I don't have to do it again!
Post Script: I sold this bike in December of 2016 and replaced it with another - a new leftover 2015 and as part of my preparation of the new bike, I installed zerks on in it too. In doing so I discovered that two of the DR350 suspension bolts and internal spacers (which are drilled for and have grease fittings) will work in this linkage. This solves the problem of greasing the joints on pivots C and E. These are a direct fit: